Arrive the goods
When the cargo arrives on the truck at the warehouse, the first task is to create a Truck Offload:
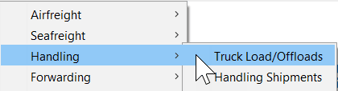
In the main menu, go to > Handling > Truck Load/Offload.
In the overview of Truck Loads and Offloads:
- Choose New.
- Click on Truck Offload Import.
Registering the truck offload
In the Truck-Unloading complete the details about the arriving truck as desired:
Leave the following dates/times empty until the handling shipments have been created:
- End Offload
- Actual Truck Departure

Now click Save on the toolbar in order to create the handling shipments.
Create the handling shipments
In the Truck-Unloading, click New Receipt (Forwarder) at the bottom of the screen:

Enter the Customer and Consignee in the Import Receipt. Then enter the bills of lading, Scope will immediately try to match the bills of lading to the correct handling shipment:

Add goods details and confirm the goods are arrived and as expected
- Click the Details tab of the import receipt and the expected goods will be shown,
If packages/goods are not shown, click Synchronize packages on the bottom to make them appear. Further details for individual packages can be entered. - For each item, use the menu option to the right Status to select Expected and Scanned in order to show the goods as arrived in the warehouse:

If there is no need to add details about the goods, they can be arrived in the warehouse by doing a virtual scan by clicking Virtual Scan. 
Finish the Import Receipt
In order to finalize the off-loading of the goods at the warehouse, the date and time of the end of the offload truck must be recorded and the date and time of the actual truck departure details need to be completed on the general tab of the Truck-Unloading.

As soon as these details are entered, the Finish option on the menu bar become active, click this and then click Finish in the confirmation screen.
Now the handling shipment status will be updated to show this off-loading and the status becomes Completely in stock.
This new handling shipment will also now be visible in the "Handling shipments" together with its status.

Remove the goods from the warehouse
When it is time to distribute, the goods from the warehouse go back to the Truck Load/Offloads.
In the main menu, go to > Handling > Truck Load/Offload.
In the overview of Truck Loads and Offloads:
- Choose New.
- Click on Truck Load.
Fill in the truck details and any of the following:
- Estimated Truck Arrival
- Actual Truck Arrival
- Estimated Truck Departure
If the truck is picking up a complete shipment, click New Shipment Take-Out at the bottom of the screen. If the truck is picking up just packages (part-shipment), then click New Package Take-Out.

Select the shipment to be delivered and complete the Delivery party details and reference number:

Final steps
- Enter End Load date and time.
- Enter Actual Truck Departure date and time.
- Click Virtual Scan.
- Click Finish.
- Click Save.
The goods will now be removed from the warehouse.
Use the Print option to print a loading list and warehouse labels.
Create a delivery order for the trucker
In addition to removing the goods from the warehouse using the truckload shown above, you can also print a delivery note for the truck from within the handling shipment.
Creating a transport order
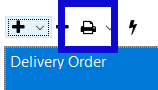
In the handling shipment (Forwarder import), choose the tab Transport Order and select the plus symbol:
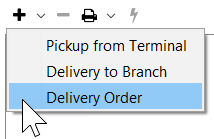
- Choose Delivery Order.
- Fill in the delivery order details.
- When ready, select the printer Icon to print the delivery order.