Finish button
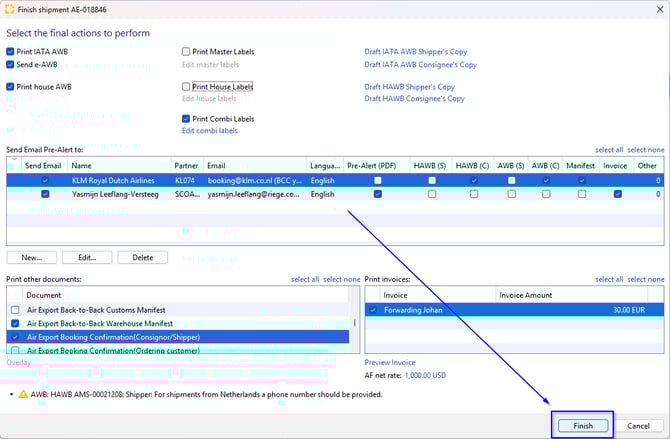
By pressing the “Finish...” button, you can send the FWB, FHL, Pre-Alerts, and Invoice in one overview. From the same screen, you can also print documents.
How to use the “Finish...” button
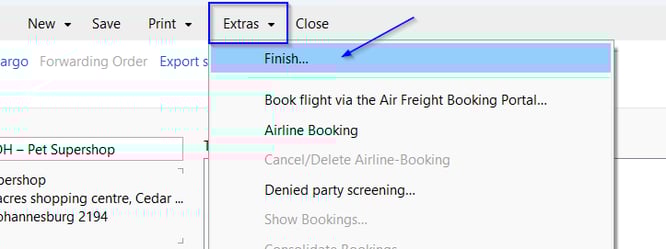
After completing your Air Export shipment and the House and/or Air Waybill, click “Extras” at the top of the screen and select “Finish...”.
An overview will appear showing all available options for sending and printing documents. Review the options carefully and make any necessary adjustments.

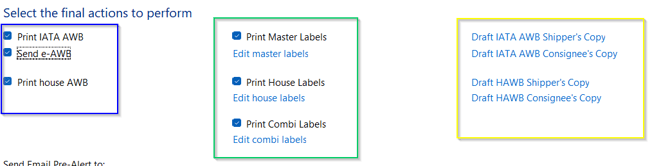
In the first section of the overview, you will find the option to print the Master and/or House Air Waybill and send the e-AWB (FWB/FHL) to the airline (highlighted in blue). The documents will appear in the Documents tab of the shipment.
Labels can still be edited or printed (highlighted in green). These documents will also be saved in the Documents tab.
If needed, you can save a draft (highlighted in yellow). The draft will appear as a PDF file on your screen. Please note that drafts are not activated by the “Finish” button, but can be saved as a PDF by clicking on them.
Sending Pre-Alerts
In the second section of the overview you can send Pre-Alerts or separate documents to selected email addresses.
To send a Pre-Alert, make sure the “Send Email” checkbox on the left side is selected.
If you select document types on the right but the “Send Email” box is not checked, the Pre-Alert will not be sent.
Below the “Send Email” option, you can add, remove, or edit recipients for the Pre-Alert.
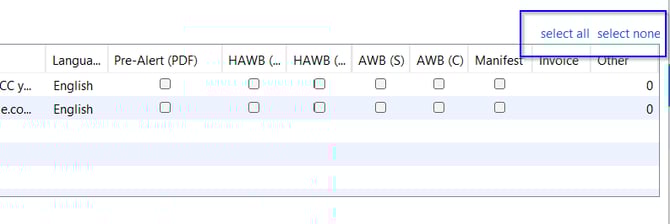
Tip: HAWB (S) and AWB (S) is the option to send the shipper set, HAWB (C) and AWB (C) is the option to send the consignee set.

To quickly select or deselect all options and recipients, use the “Select All” or “Select None” buttons located above the “Other” section in the email overview.
Additional Documents
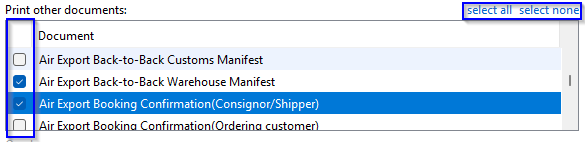
In the lower section of the overview, you will find additional documents that can be printed, such as:
-
Manifests
-
Customs documents
-
Certificates
-
Booking confirmations
Scroll down to view all available options.
After printing, these documents will also appear in the Documents tab of the shipment.
You can again use “Select All” or “Select None” to quickly choose or deselect all documents.
Sending Invoices
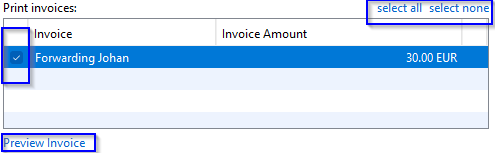
At the bottom of the overview, you can send invoices.
Please note that the invoice must first be prepared in the Invoice tab of the shipment before it can be selected here.
If multiple invoices are available, you can use “Select All” or “Select None” to manage them easily. You can also preview the invoice before sending it to verify the details.
Please note that the partner needs to be a debtor and the email address needs to be mentioned as "Invoice recipient" in the partner before you can send the invoice in the "Finish" option.
Finalizing the Process
Once all settings are correct, click the “Finish” button at the bottom right of the screen.
The system will:
-
Send the selected documents to the checked email recipients
-
Send invoices to the email addresses linked to the partner on the invoice
If printers are connected to the Scope account, the selected documents will be printed automatically.
All generated documents will also be available in the Documents tab of the shipment.
If no printers are connected, the documents will only be saved in the Documents tab.