How can I set a debtor for automatic email invoicing?
This guide describes how a debtor can be set up to receive invoices via email. This means once you print the invoice, it will immediately be transmitted to the customer by email.
Preparation
- Go to Master Data > Partner
- Select and open a partner (or add a new one) and then head to the second tab Contacts.
- Add a new contact or edit an existing contact, then enter an email address and check the box Invoice recipient for this contact.
Set debtor role
- Go to the tab Roles for the partner and click on the Debtor role (or add a new role Debtor).
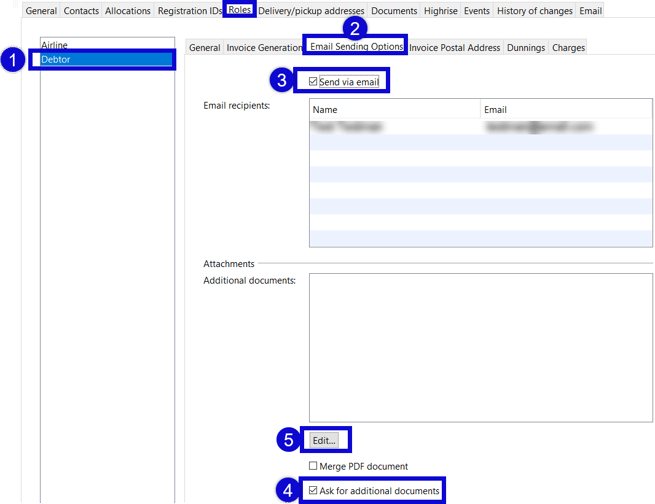
- In the debtor role (1) go to the Email sending options tab (2) and check the box Send via email (3) - The party/s created as invoice recipients in the contacts will appear.
- If you need to include additional documents, check the box Attach additional documents (4).
- If you want to attach certain documents automatically to the invoice email, you can select them from the list you get when you push the Edit button (5).

Email/sending the invoice
When invoices are created for this debtor, as soon as the Print button is selected, the invoice will be attached to an email and sent to the recipient specified in the contacts tab of the debtor.
If the Ask for additional documents has been checked, a pop-up will appear prior to sending that will allow the desired documents to be selected and attached to the invoice.
The resulting email will appear in the Email tabs of both the shipment and the invoice.
The subject line and the standard message in the body of the invoice can be customized. This can be done in the Email Settings (Settings > Email Settings > Templates).
