How can I create report layouts?
This how-to will explain how a customized report layouts are designed in Scope. First create a layout, then apply it to get customized reports.
Design a layout
Start: Master Data > Layouts
In the layout overview, you can preselect the layout type you need.
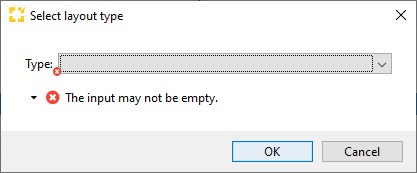
However, if you press New in the top menu, you will be stated to confirm the layout type. 
Here are a few examples of layout types:
- Customer Invoice Report
- Partner Turnover Report
- Shipment Monitor
- Shipment Overview
- Web-tracking
Press OK to get to the layout editor.
Layout Editor

-
Give the new report a short, meaningful name in the field Name.
-
Next, provide a full description of this new layout so that it is easy to identify in the future.
-
If the report should only to be visible to you, then check Private. If it is to be visible to all users, then check Public.
-
Now choose which fields should appear in the report. The available fields are shown in the left-hand column. Use the Add > button to add them to the right-hand Chosen column, and the < Remove button will remove them again from the right-hand column.
- To change the order of the columns of the report, highlight an item in the list on the right and use the Up and Down buttons to move it to the correct order. You can also rename all the column names in the chosen list: Click the action link Rename chosen columns.
Depending on the chosen Layout type, there may be more options to choose from like: Charge type groups, Reference types, etc. - Click Save to store the new report, which will now appear in the list of saved reports.
Using the new custom report layout
In the example above, we created a layout for a Partner Turnover report.Navigate to the Shipment Overview to apply it.
Start: Forwarding > Shipment Overview
- In the shipment overview, apply any filters to focus on the required shipments.
- Now print the partner turnover report by clicking the blue Partner Turnover link.
- An overlay appears where the name of the desired partner can be entered/selected, and the layout created above can be chosen (double-Click in the field).
- Click OK to open the spreadsheet, that will use the chosen layout.
